ConvertKit
What Is ConvertKit?
ConvertKit is a full-featured email service provider (ESP) created by Nathan Barry. Thanks to its ease of use, automation and other features, it’s one of the fastest-growing email marketing companies around. It also offers customizable sign-up forms and landing pages to help bring in more email subscribers.
What Makes ConvertKit Different Than Other ESPs?
- Many of the most popular email service providers were built with the previous generation of technology and design trends, leading to overly complicated tools with steep learning curves (like Keap) or not built for modern day use cases (like MailChimp).
- ConvertKit is easy to use, decently powerful, and its paid plans are fairly priced. They also offer a free landing page plan.
- ConvertKit is designed for one type of target audience: online creators (like bloggers and YouTubers). Which means that there aren’t a lot of ecommerce-focused features that you don’t need.
Key Features
ConvertKit Overview
ConvertKit’s interface is organized into five tabs, which I’ll cover in more detail below.

First, here’s a quick overview of each of them.
- Subscribers: the people who have subscribed to your email list.
- Landing Pages & Forms: ConvertKit offers a large variety of customizable, responsive landing page templates and forms included with all pricing tiers to help you get more email signups.
- Broadcasts: a broadcast is a one-off email to your list (or a segment of it). Ideal for traditional newsletters.
- Sequences: a sequence is a multi-part series of email (basically an autoresponder).
- Automations: automations allow you to do things like automatically send different emails to people based on the actions they’ve taken, such as clicking a link or opening a specific email.
Subscribers
Pretty much every email service provider charges based on the size of your email list. But ConvertKit was one of the first to do so based on the number of unique subscribers. In practical terms, this means that there’s no double-counting if the same person subscribes via multiple sign-up forms or ends up in more than one sales funnel.
With that, here’s what you can do with this tab.
See Subscriber Overview Data
On the Subscribers tab, you can see your total number of subscribers and growth in subscribers over time.
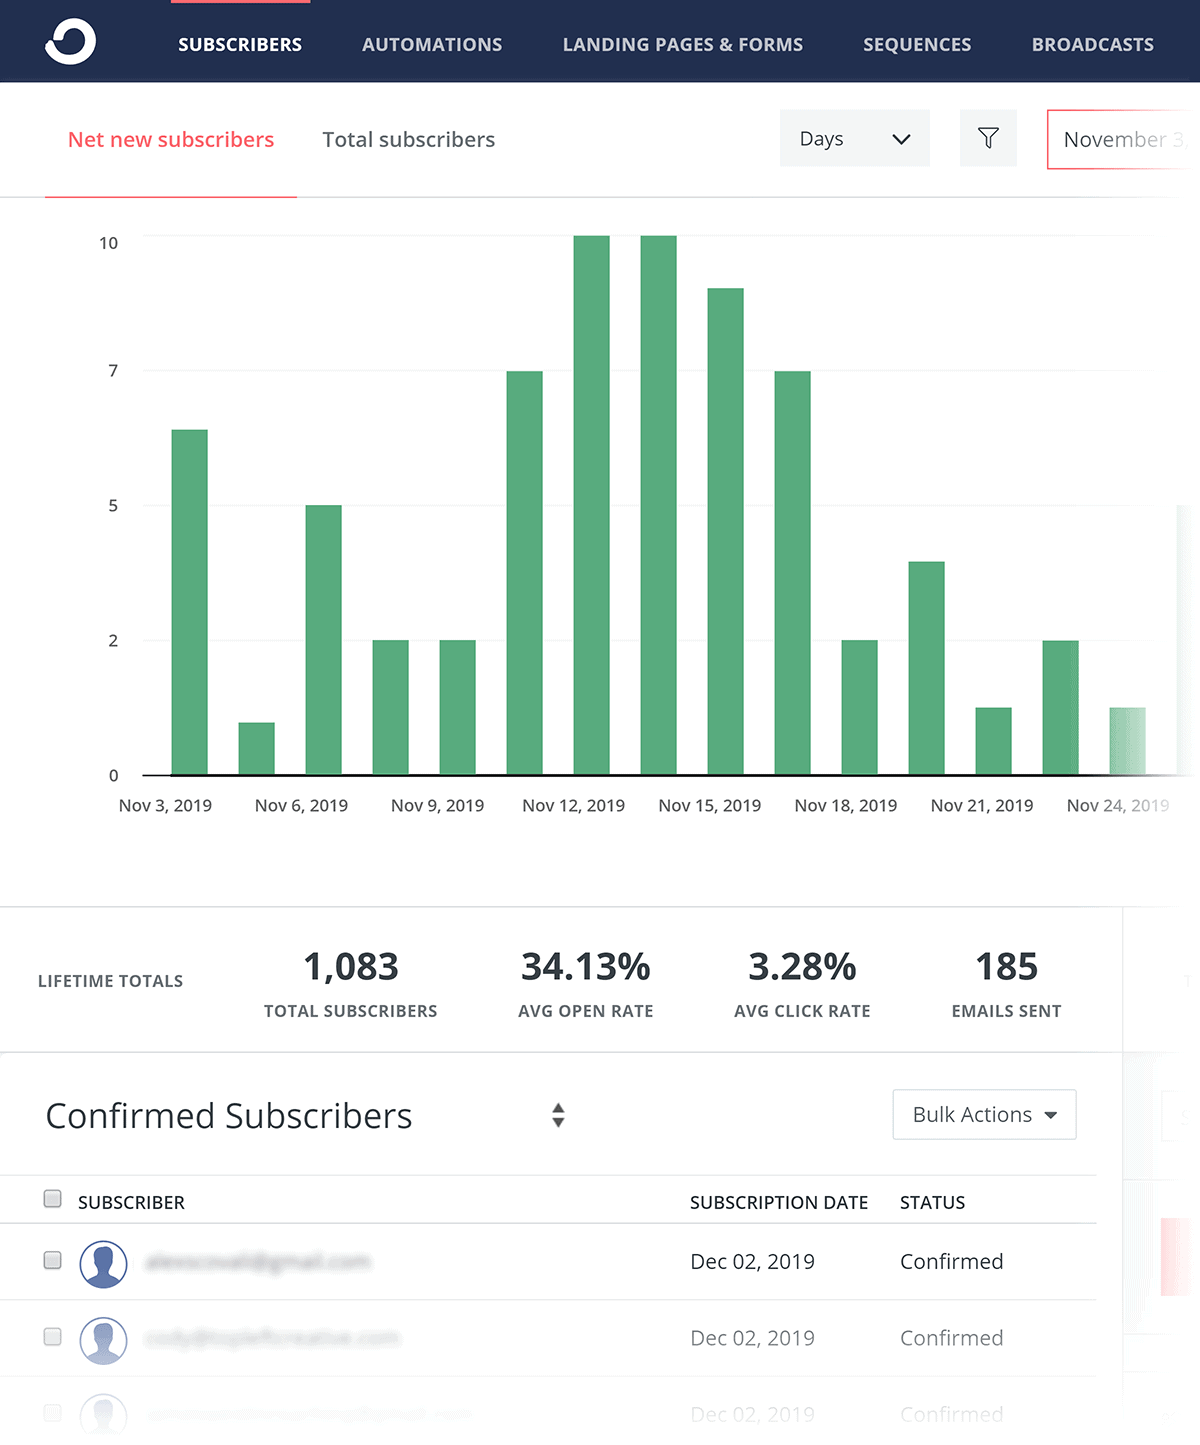
You also get access to stats like average open rate, average click rate and total emails sent.
It’s basically a dashboard to see how your list is growing, and how people are interacting with the emails that you send.
Segments and Tags
You can also see your segments and tags, which are how you keep your subscribers organized.
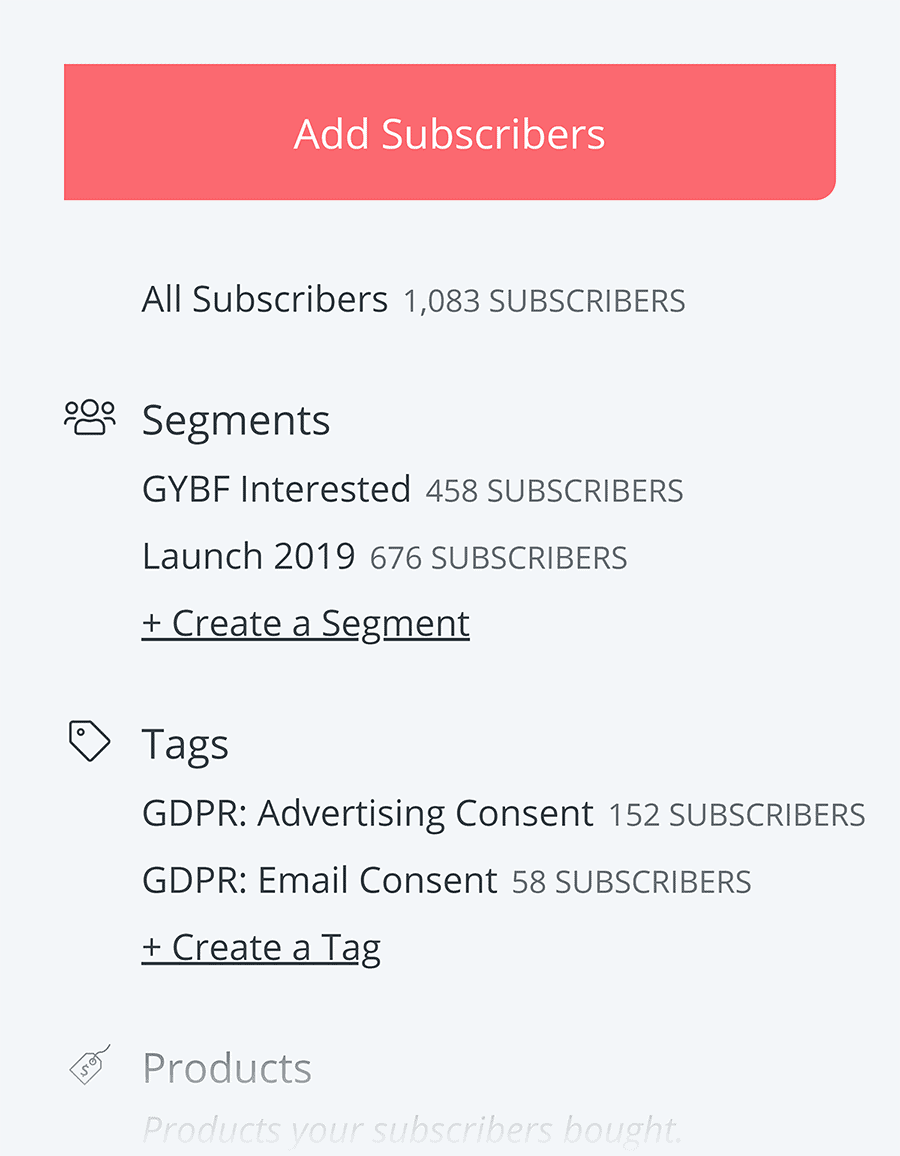
You can tag people automatically based on when they signed up, which of the links in your emails they’ve clicked on, and much more. And then you can create segments from these different tags.
For example, let’s say you only wanted to send a newsletter about email marketing to people that have opened a newsletter on that topic.
Well, you’d simply need to tag anyone that opened one of those emails. Then, create a segment around that group.
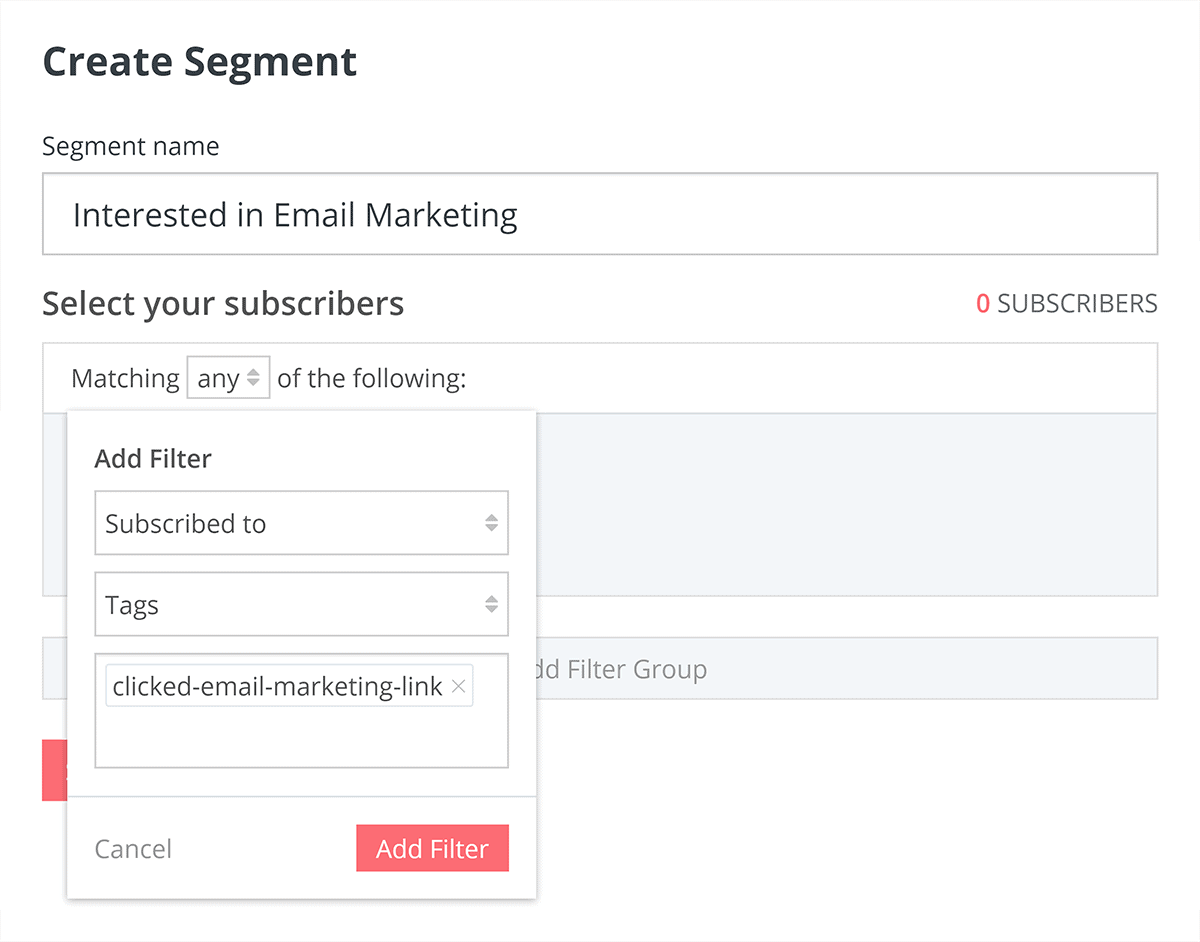
Finally, tell ConvertKit to only send that newsletter to those people.
You can of course combine different tags together to get super targeted with your emails. But in my experience, this is more trouble than it’s worth.
Sign Up Form
Another key piece of information about your subscribers is the form they came in on. I’ll talk more about forms later. But for now, just keep in mind that whenever someone signs up to your email list on ConvertKit, the opt-in form they used will be forever saved as part of their subscriber profile.
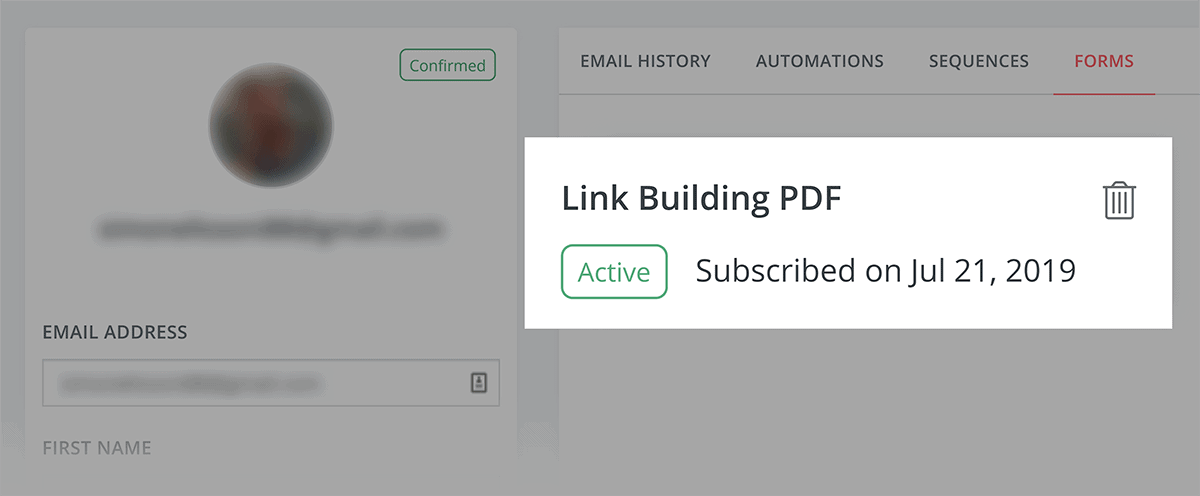
Why is this helpful?
As an example, the content on our blog is divided into two main categories: YouTube and SEO.
There’s some crossover there. But in general, people that want to grow their YouTube channels aren’t super interested in ranking higher in Google. And folks that want to improve their Google rankings don’t want to read content about getting more views on YouTube.
This is why tagging folks that sign up from our different forms is super helpful. That way, we can send our YouTube and Google stuff to people that want it. In other words: this is basically a tag for new subscribers that doesn’t require them to do anything extra.
Automations
“Marketing Automation” is the big buzzword in the world of email marketing right now. And for good reason: marketing automations can help you automatically send better content and offers to targeted segments of your audience.
However, tools like Drip are great for setting up complicated funnels and automations. But they have a steep learning curve. So if you only want to create some simple automations based on a few behaviors, ConvertKit is your best bet.
That’s because ConvertKit has a robust yet simple automation tool.
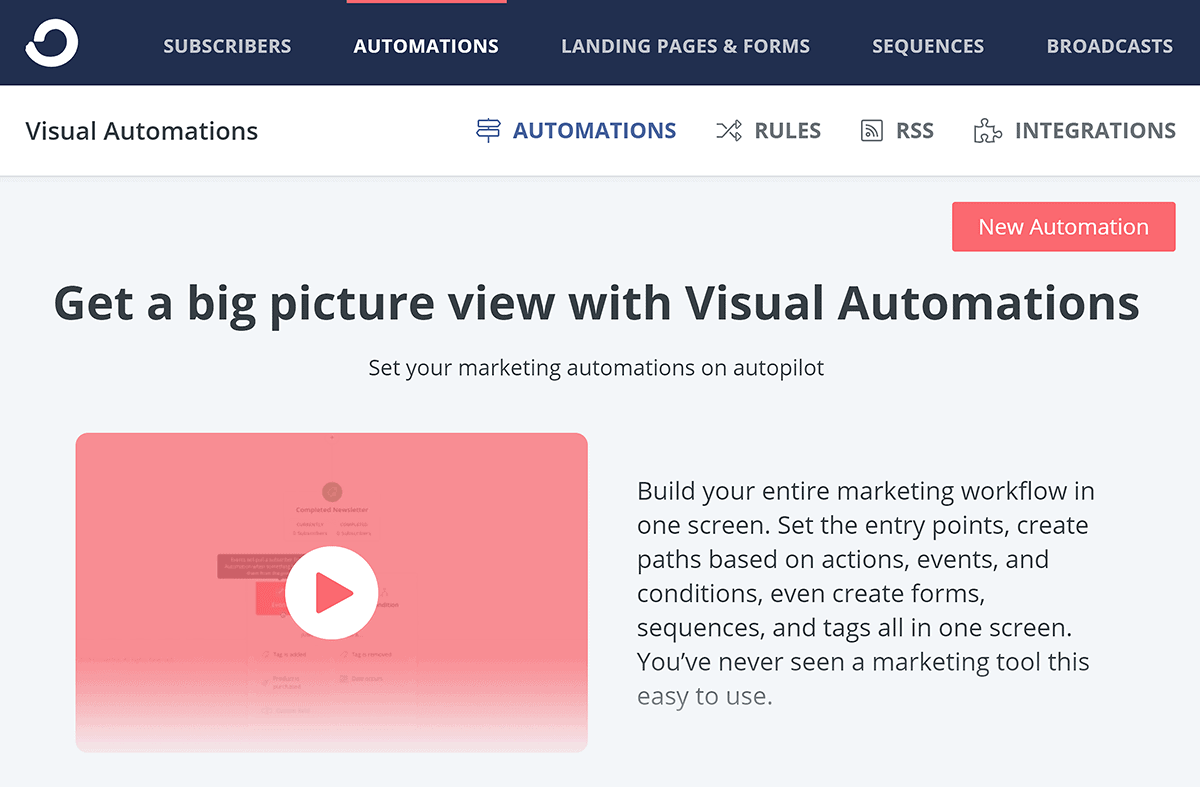
Automations in ConvertKit consist of two main parts: triggers and actions. A trigger is an event or behavior that starts the automation, and the action is what you want to have happen.
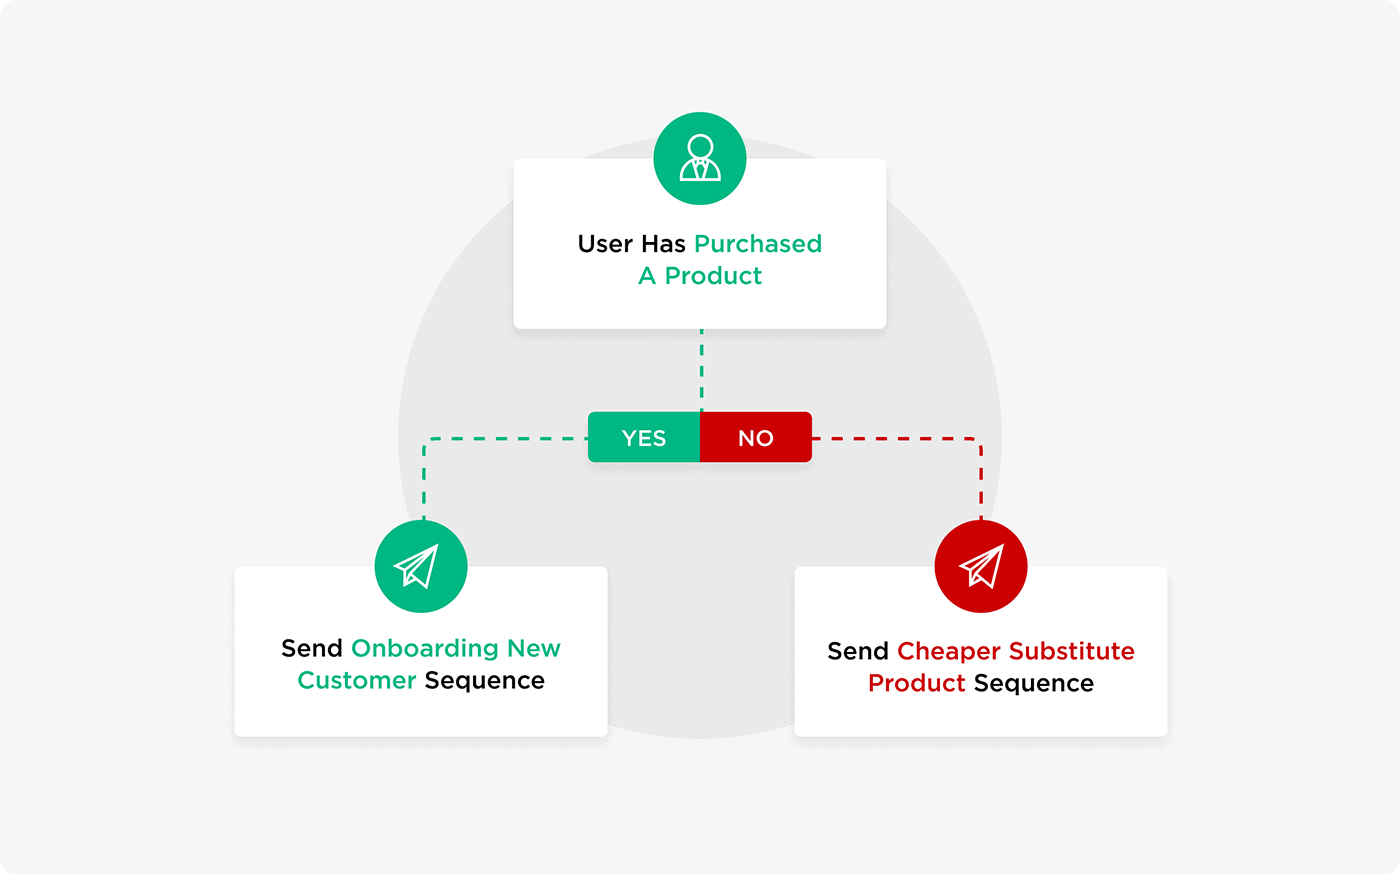
For example, you can set up an evergreen product pitch that consists of multiple email sequences (a warmup sequence and a launch sequence). Then, if they haven’t yet bought the product, you can automatically offer a cheaper substitute product. And finally, that same sequence can send additional onboarding email to those who buy and tags them as purchasers.
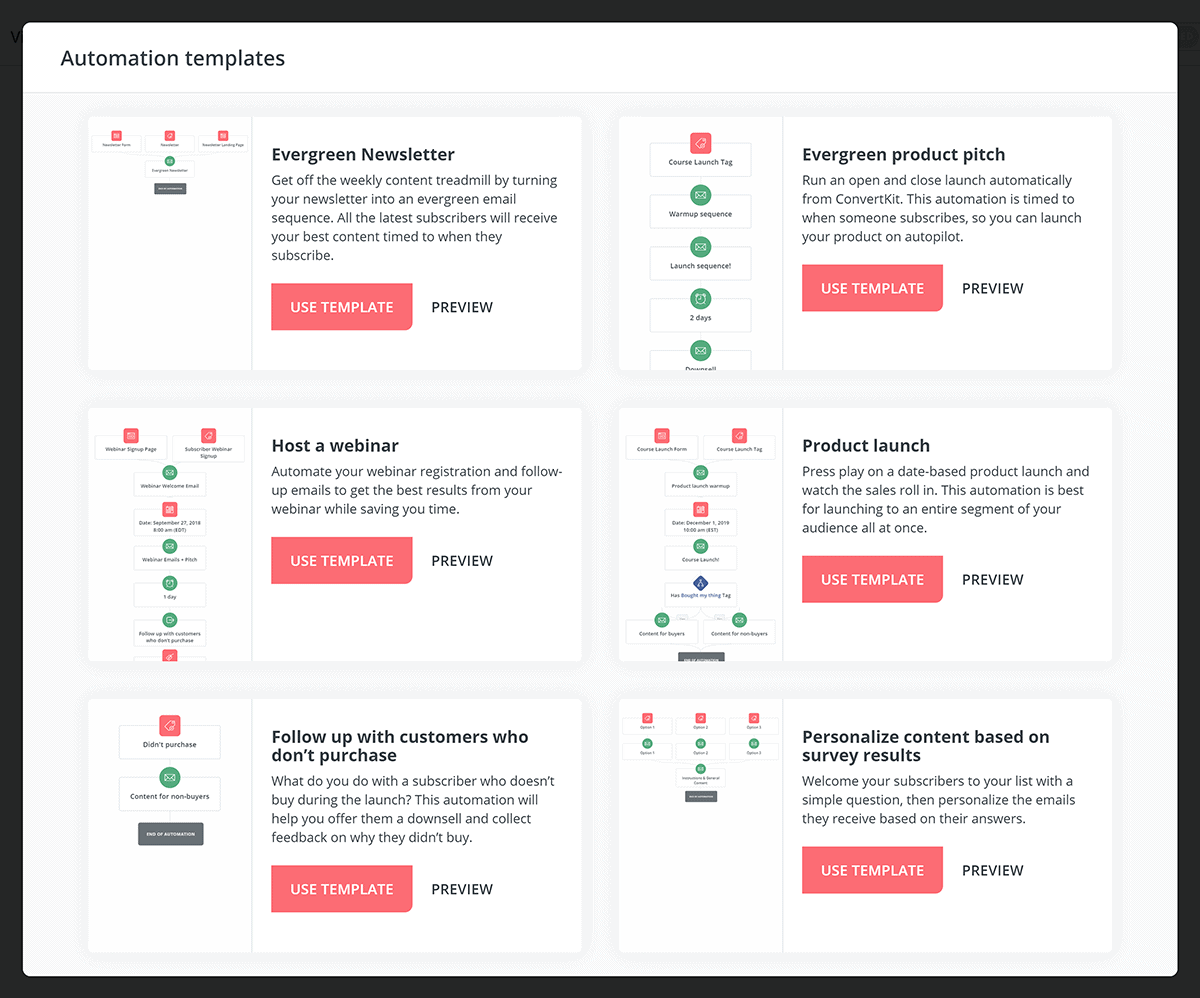
ConvertKit offers 6 different automation templates for things like launching a product, hosting a webinar (with automated webinar registration and follow-up emails), and personalizing content based on how your subscribers answer a question.
You can also create new automations from scratch, using triggers such as “joins a form” or “purchase.”
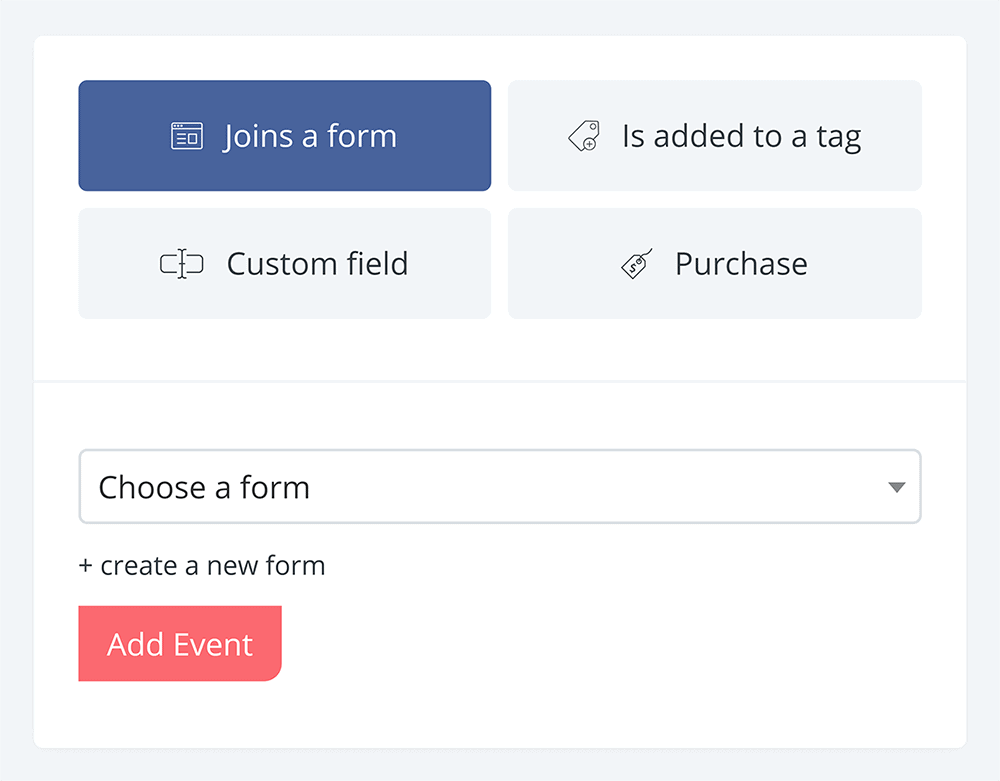
From there, you can set them up to receive email sequences, add or remove them from tags, and more.
Pro Tip: try chaining multiple automations together, so that when one automation finishes, another is activated based on a different set of rules. That way, older subscribers never get lost in the shuffle and are getting new content from you on a regular basis.
Landing Pages and Forms
ConvertKit’s built-in forms and landing page functionality is pretty solid. Especially when you consider this feature is free. You can set them up on your own in minutes without needing to pay for any third-party tools or hire an expensive designer.
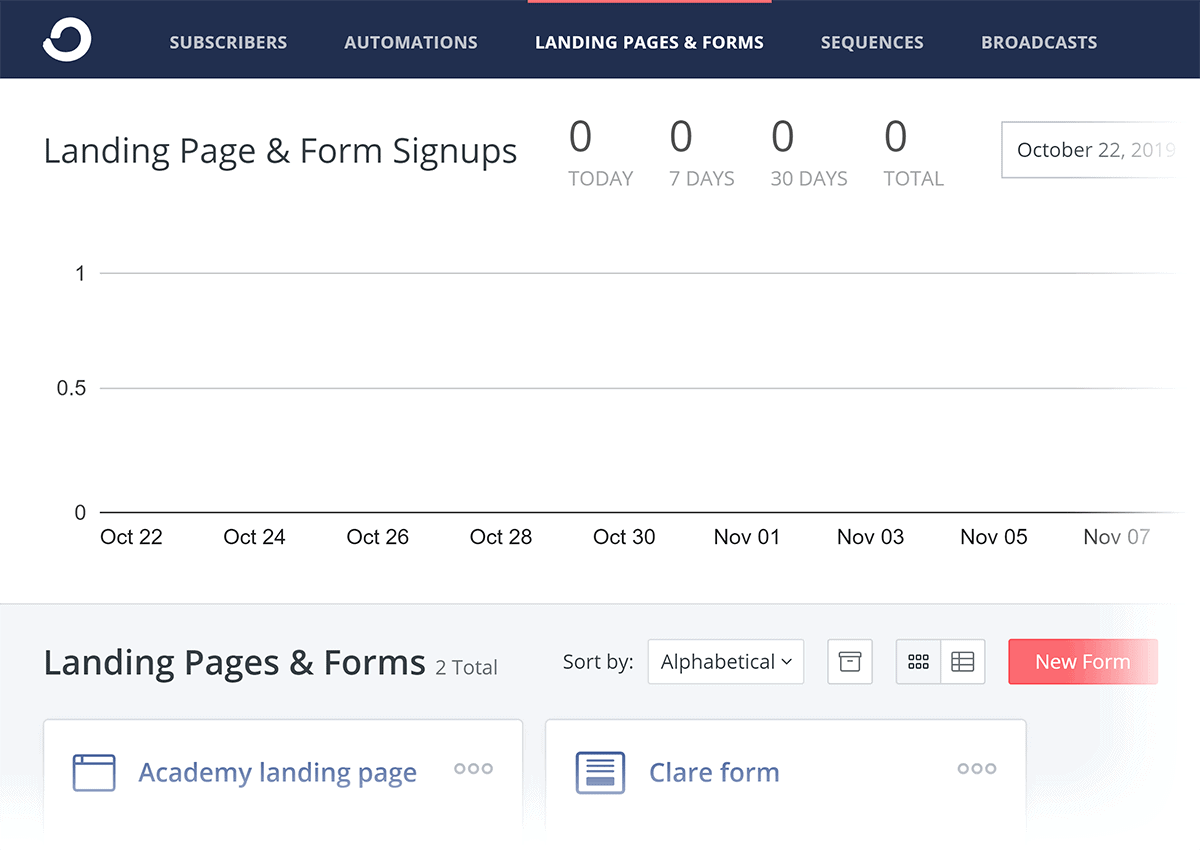
Forms
Forms are literally the form where someone submits an email address.
Forms are the entry point to your email list for every subscriber that you get in your ConvertKit account.
Even if you’re not embedding ConvertKit’s forms on your site (for example, you instead use something like Leadpages, a WordPress plugin or OptinMonster for the front-end) you’ll still need to set up a form in your ConvertKit account for those subscribers to be tied to.
Your first step is to create a new form.
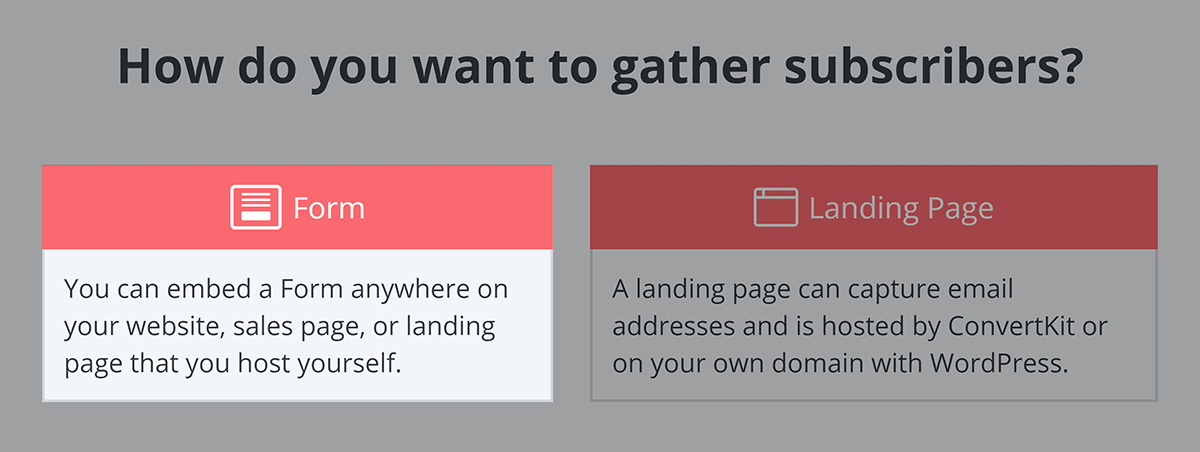
Then, choose how you want to use each form on your site.

You can embed forms on your site directly.
Or trigger them to pop up, for example, when someone clicks a link to download one of your content upgrades.
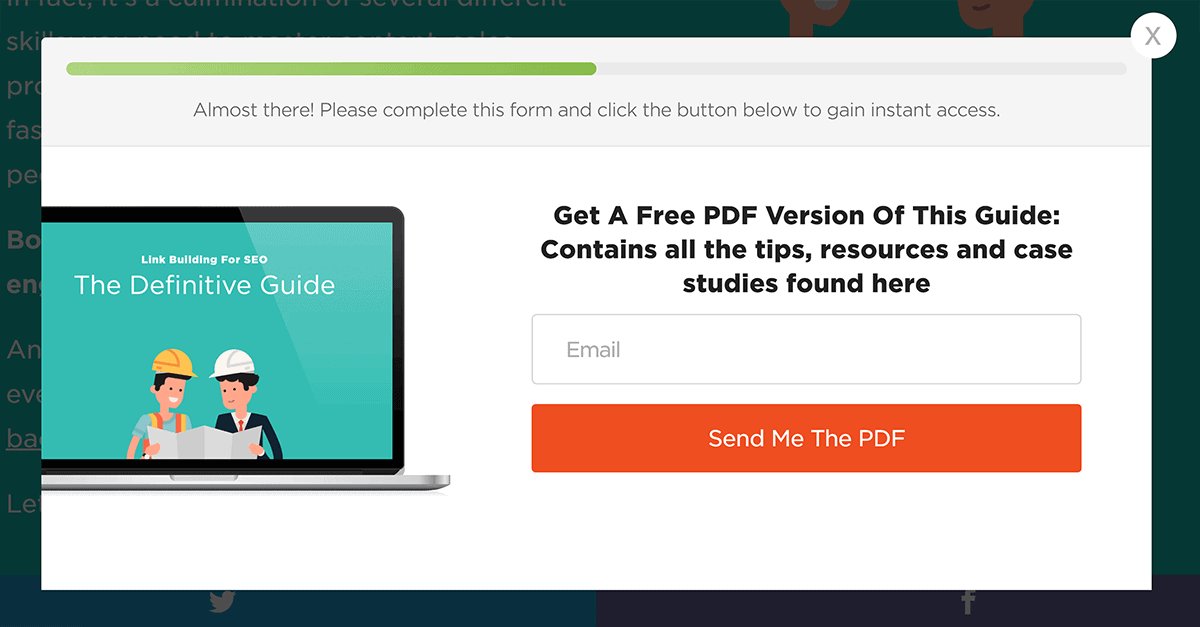
You can even trigger forms to show up based on exit intent (like a popup). This is called “Modal” in ConvertKit terminology.
Note: By default, your forms are all set to double opt-in. In ConvertKit parlance, double opt-in is known as sending an “Incentive Email”.
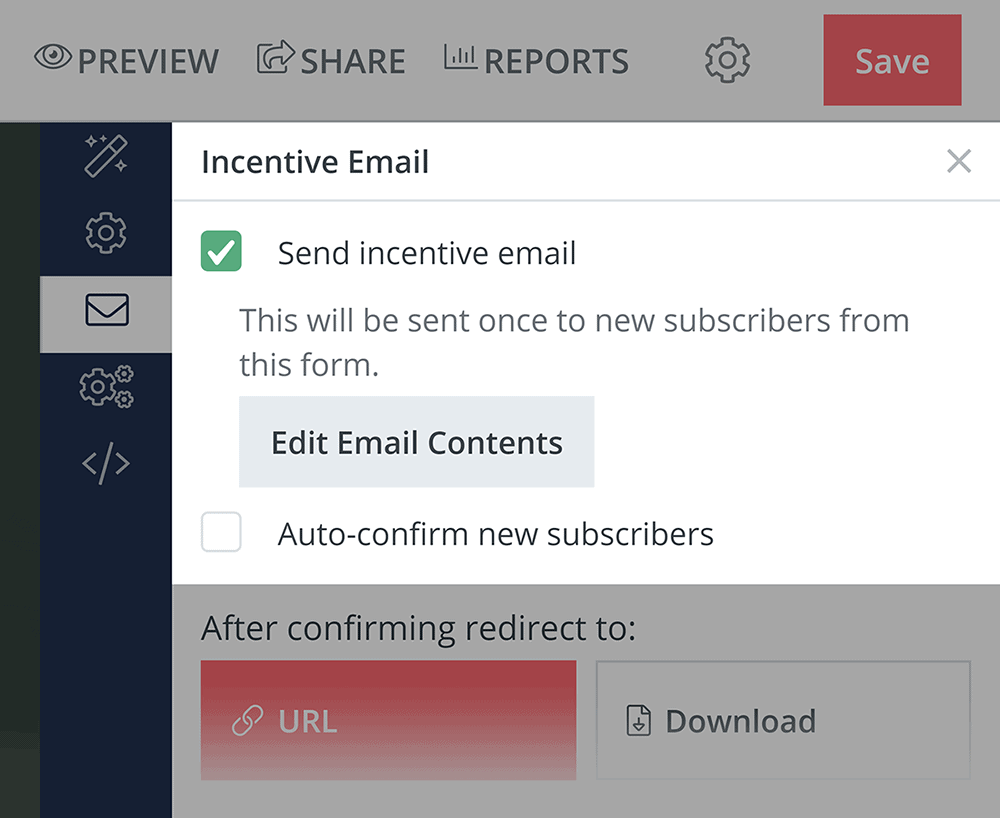
In my experience, this should stay checked as it reduces the chances of deliverability problems down the road.
Landing Pages
Unlike forms, landing pages are strictly optional. As forms, they’re responsive and customizable, but unlike forms, they’re hosted on a standalone page.
For example, on the Backlinko blog, we have a page that’s dedicated 100% to our free email newsletter.
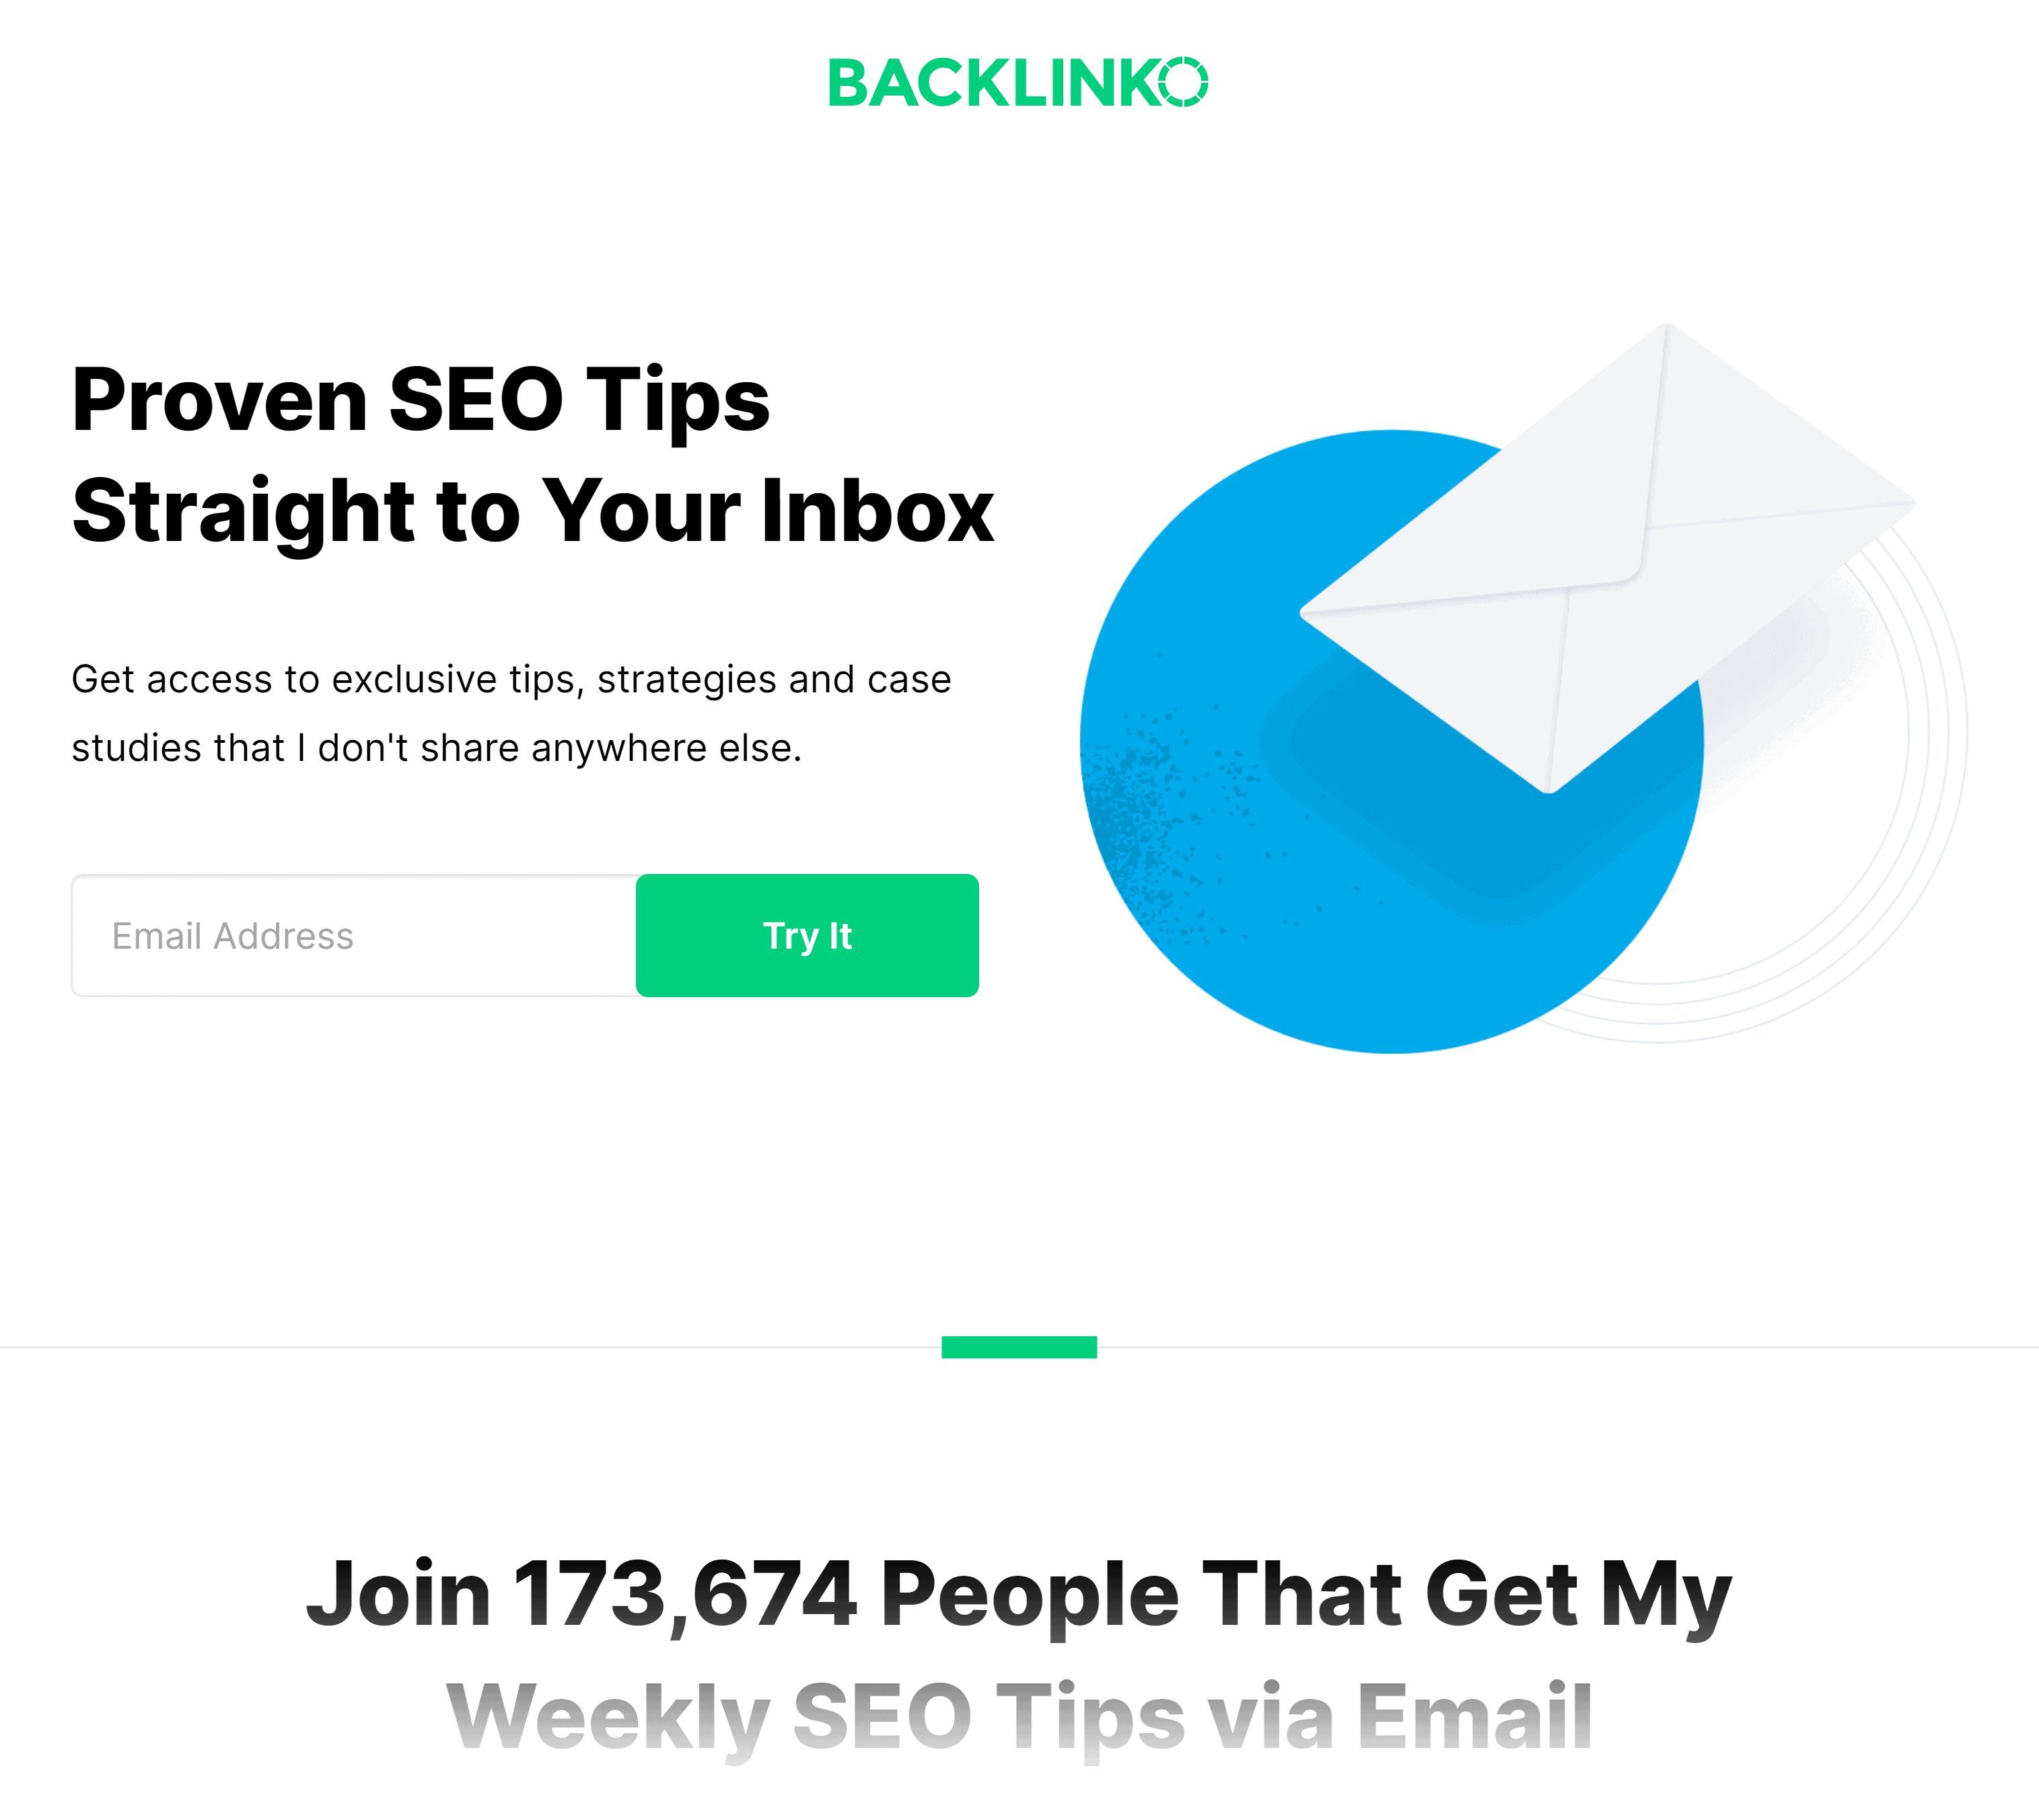
And there’s a form (actually two of them) embedded on that page.
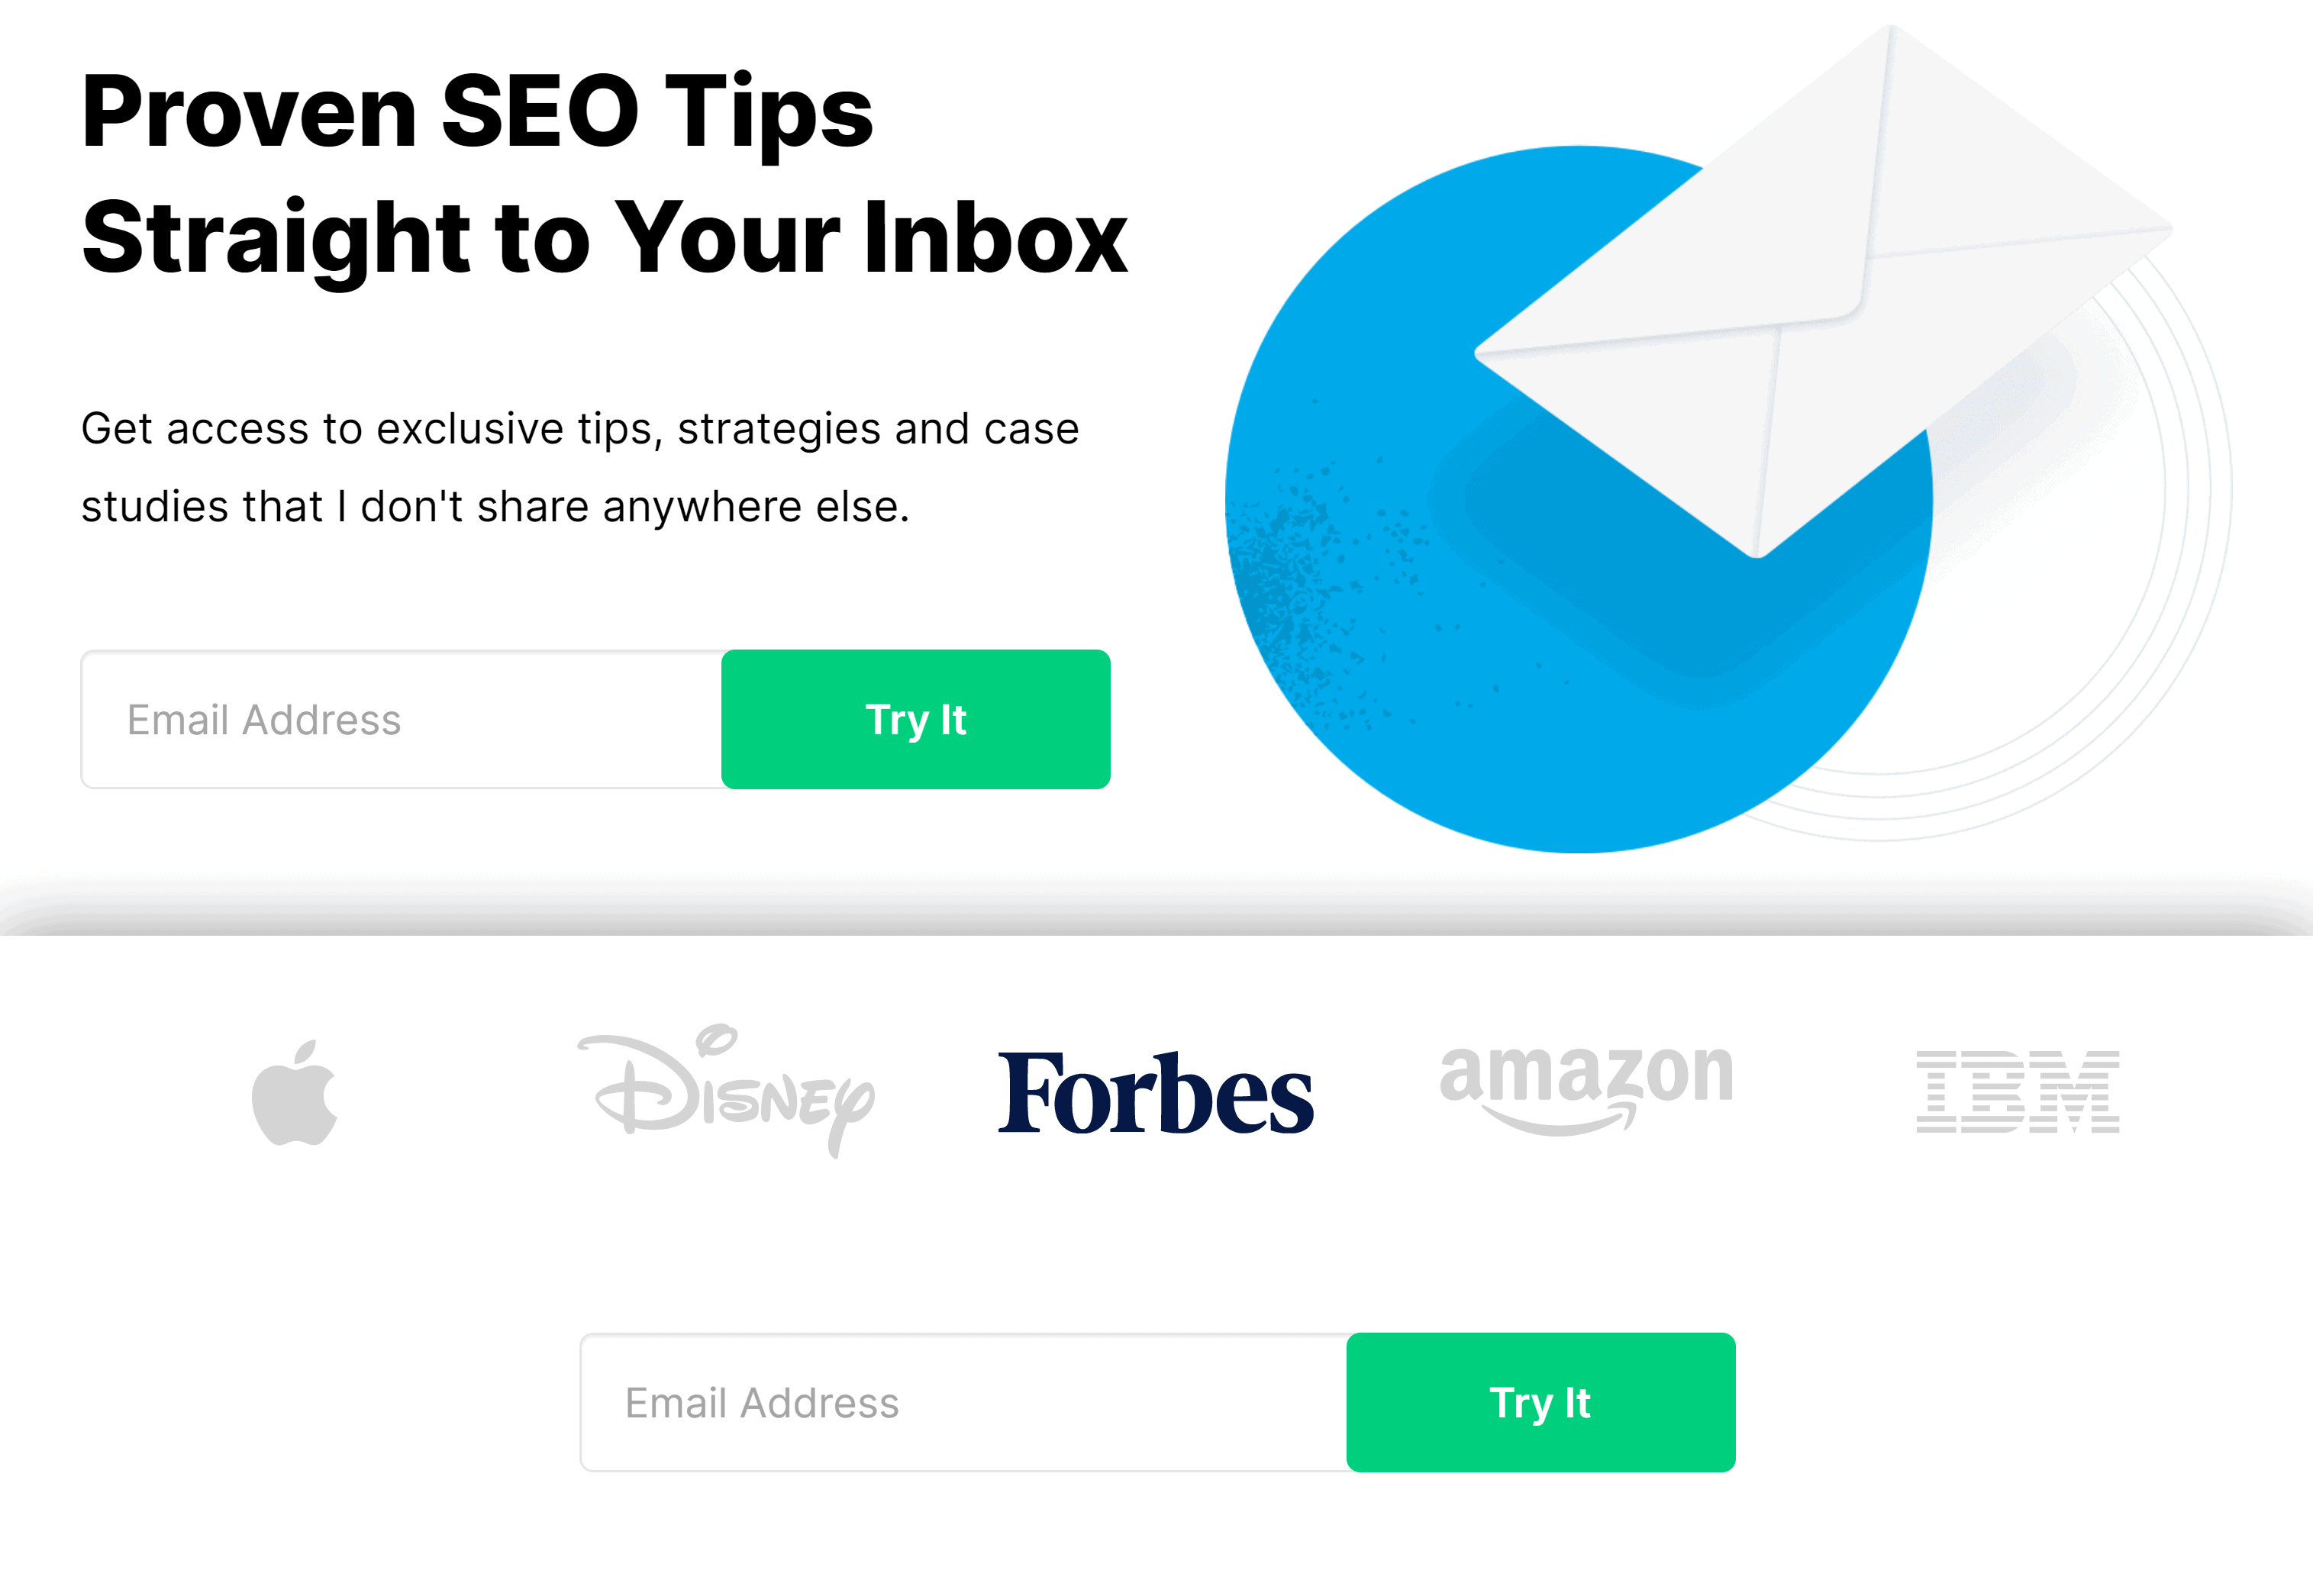
If you already use landing page software or work with a designer, you probably won’t even need to use this feature.
But if you don’t want to create new landing pages for every single ebook, report or lead magnet that you create, Convertkit’s landing pages make it easy to scale up.
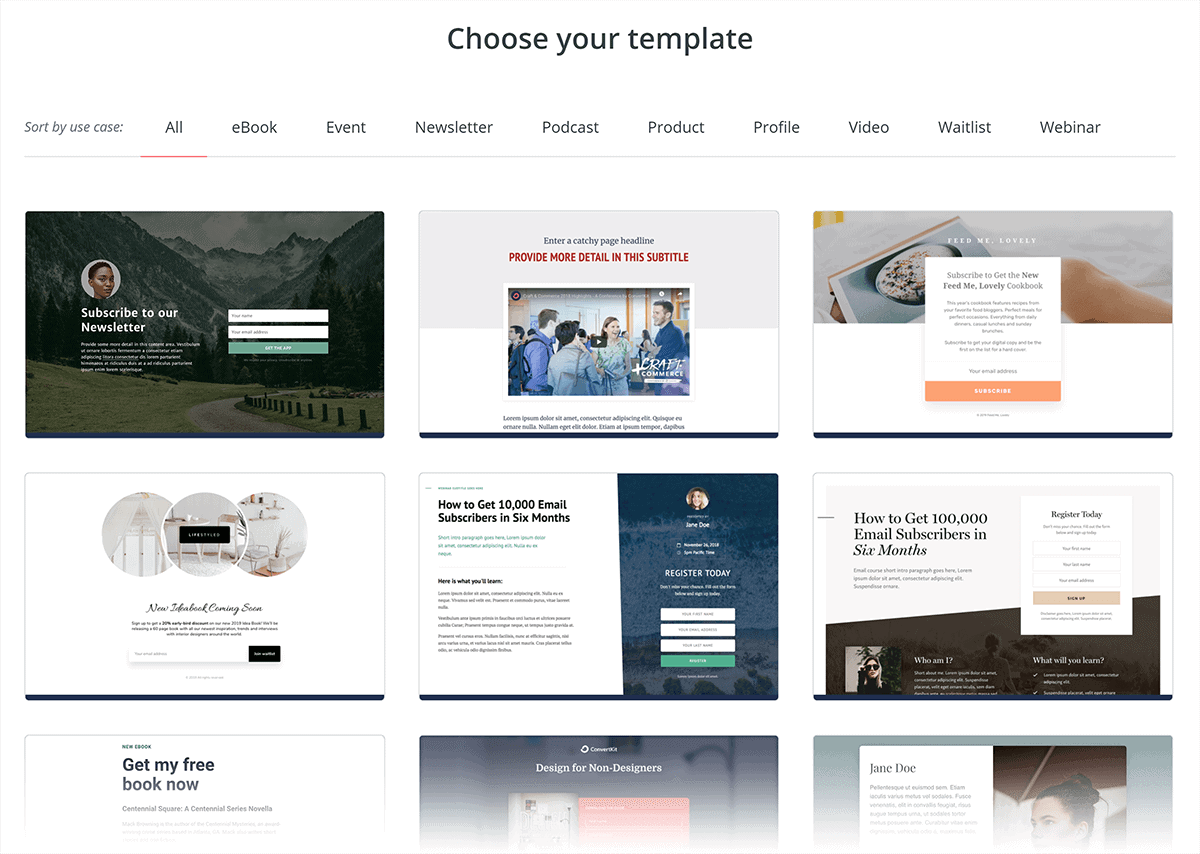
ConvertKit currently offers landing page templates, which you can personalize to fit the look and feel of your website.
Broadcasts and Sequences
There are two main two types of emails you can send in ConvertKit: broadcasts and sequences.
Broadcasts
A broadcast is a one-time email you can send to your entire list (or to just a segment of it).
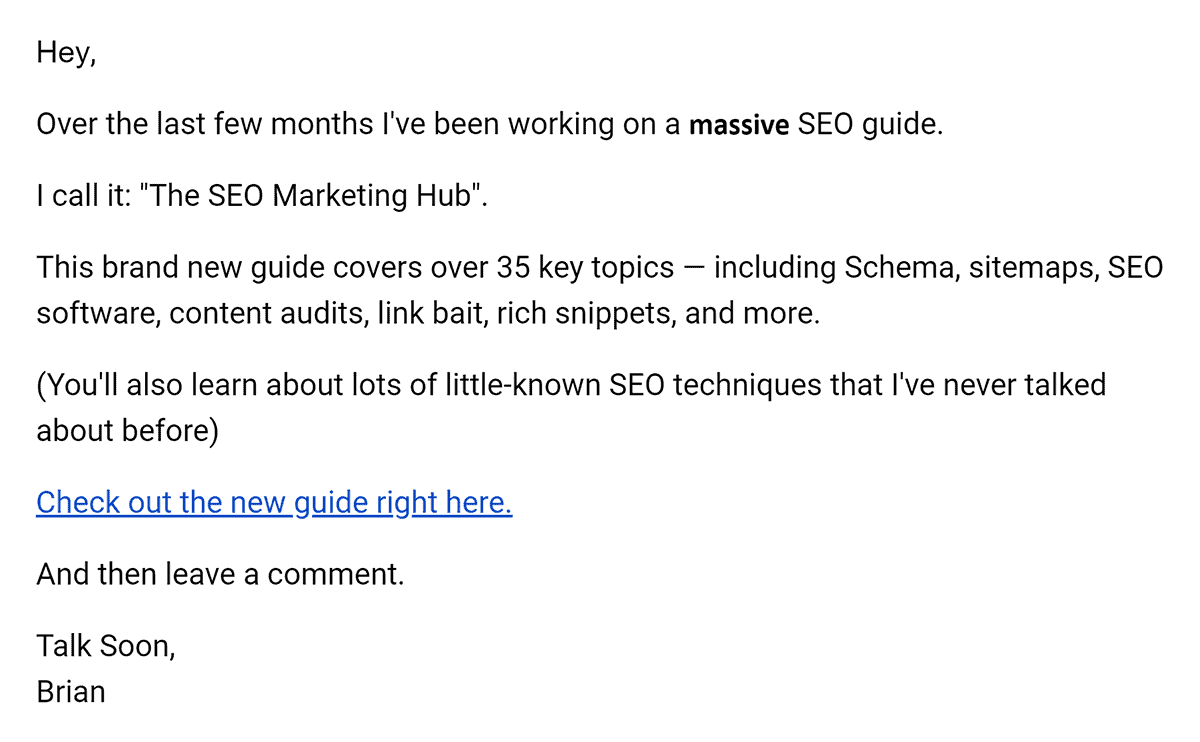
For example, whenever we publish a new blog post, we send out a broadcast to our entire email list.
But when we have a course launch, we usually only send emails to people that are interested in that course.

These are still broadcasts. But instead of going out to the entire list, it’s only going out to a segment that we created.
Sending a broadcast email is simple: all you need to do is choose who to send it to, write the email and send it. However, you definitely want to preview it first. ConvertKit’s interface does a good job of representing what the actual email will look like. But nothing beats a real-life test!
Tip: Use the A/B test feature to test two different subject lines. ConvertKit will split-test subject lines on the first 30% of your emails it sends (sending 15% with each subject line). And the subject line that gets more opens will be used for the remaining 70% of the emails. This is a very cool feature that only ConvertKit has.
Sequence
A sequence is a series of emails, with a period of delay in between each (for example, a day or two).
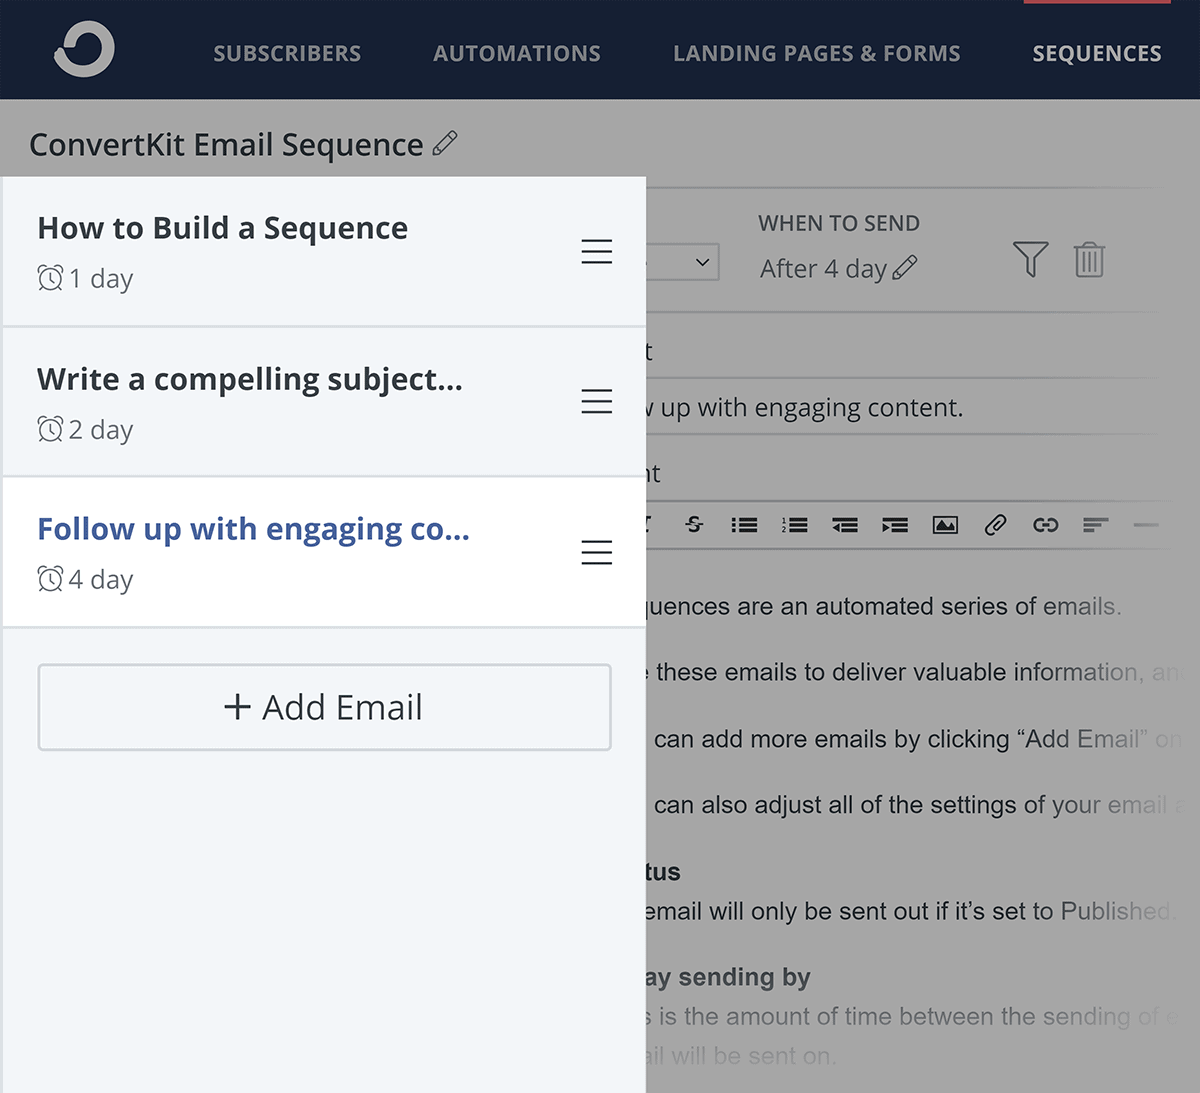
You can set them to send out with relative send dates (meaning X number of days after the person subscribed, as opposed to an exact calendar date). This makes them perfect for onboarding sequences, email courses, and evergreen product launches.
Customized Broadcasts and Sequences
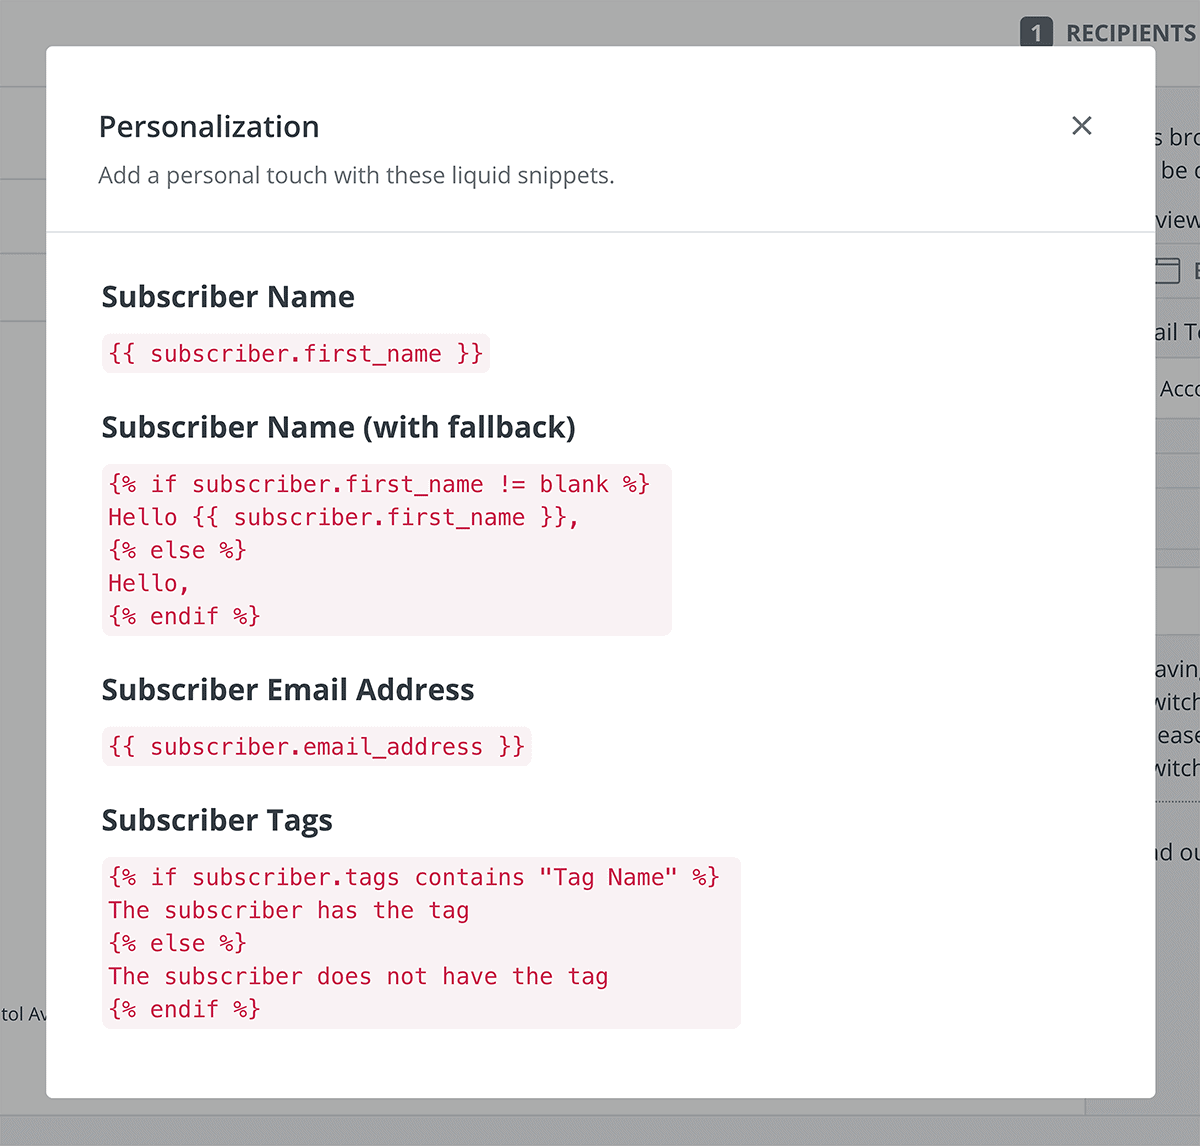
Broadcasts and sequences can be customized based on your subscribers’ names, tags, and more. For example, {{ subscriber.first_name }} will automatically be replaced with the first name on file for that subscriber.
To get a little more advanced, you can also insert entire blocks of text for subscribers who have certain tags, and other blocks for subscribers who don’t.
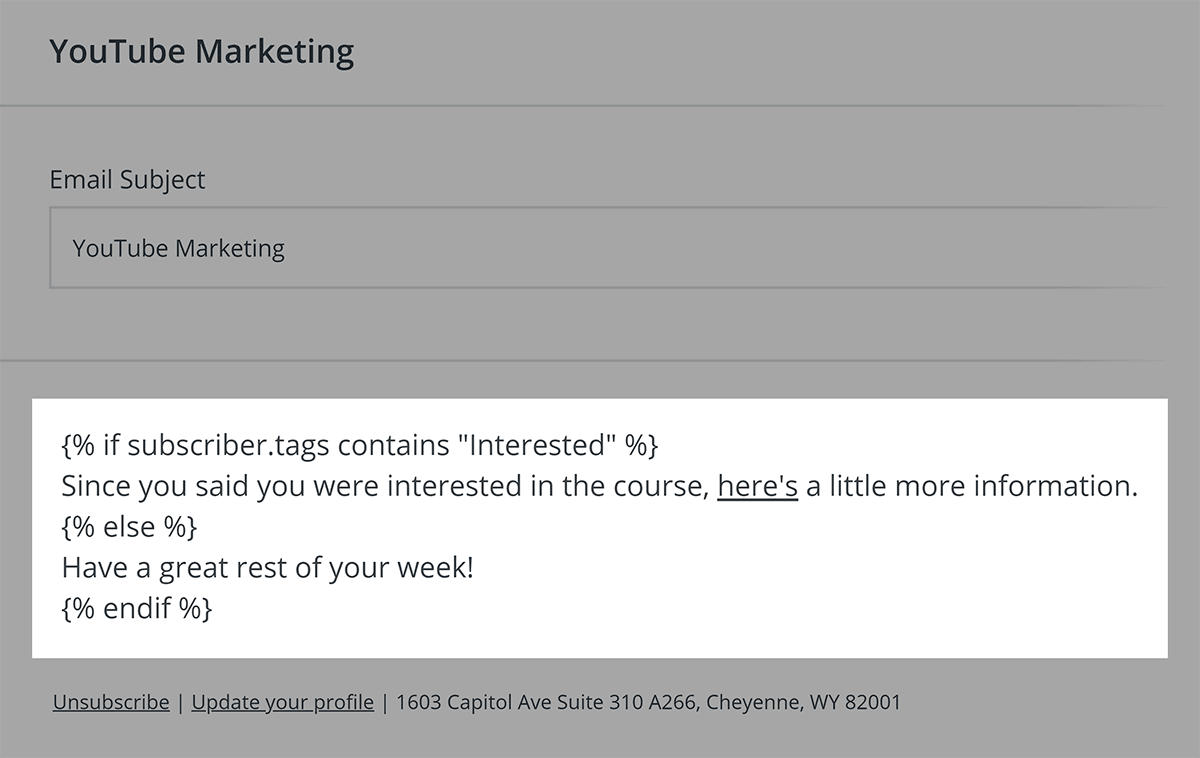
This is obviously a super-advanced feature that most businesses would never use. But if you want to send super-personalized emails, ConvertKit makes this easy via the “personalize” options shown when drafting a new broadcast or sequence email.
Learn More
How to Build an Email List: Whether you use ConvertKit, Aweber, Infusionsoft or another email marketing software altogether, this post will show you how to build an email list from scratch.
ConvertKit Tour/Demo Video: Helpful intro to how to get started with some of Convertkit’s main features.
How to use and create a ConvertKit Visual Automations: In-depth video that shows you how to set up automations in ConvertKit.