YouTube Video Editing
Now that you’ve shot your video, it’s time to dive into the editing process. Editing can turn a mediocre video into something truly amazing.
In fact the most popular channels on YouTube almost all use video editing techniques to make their videos shine.
For example, Casey Neistat’s superb editing turns unremarkable footage into compelling works of art.
Fortunately, editing doesn’t have to be hard or complicated. As long as you stick to the techniques outlined here, you’ll be editing like a pro in no time.
Best Practices and Editing Techniques
Choose The Right Software
Choosing your software is the first step in the editing process. There’s no “right” software for every YouTuber. That said, here are some of the most popular pieces of editing software on the market:
- Adobe Premiere: The undisputed king of YouTube video editing software. Most pro YouTubers use Adobe Premiere. That’s mostly because it has the rare combo of robust features and an easy-to use-interface.
- iMovie: The built-in editing software that comes with every Mac (which means it’s free). Super duper simple to use.
- Final Cut Pro: This is professional-grade software that TV and movie studios use. It’s a bit tricky to use compared to iMovie or Adobe Premiere.
- Camtasia: Ideal for screencast videos.
Color Correction
Even if you used perfect lighting during your shoot, you’ll probably want to do at least some color correction on your videos.
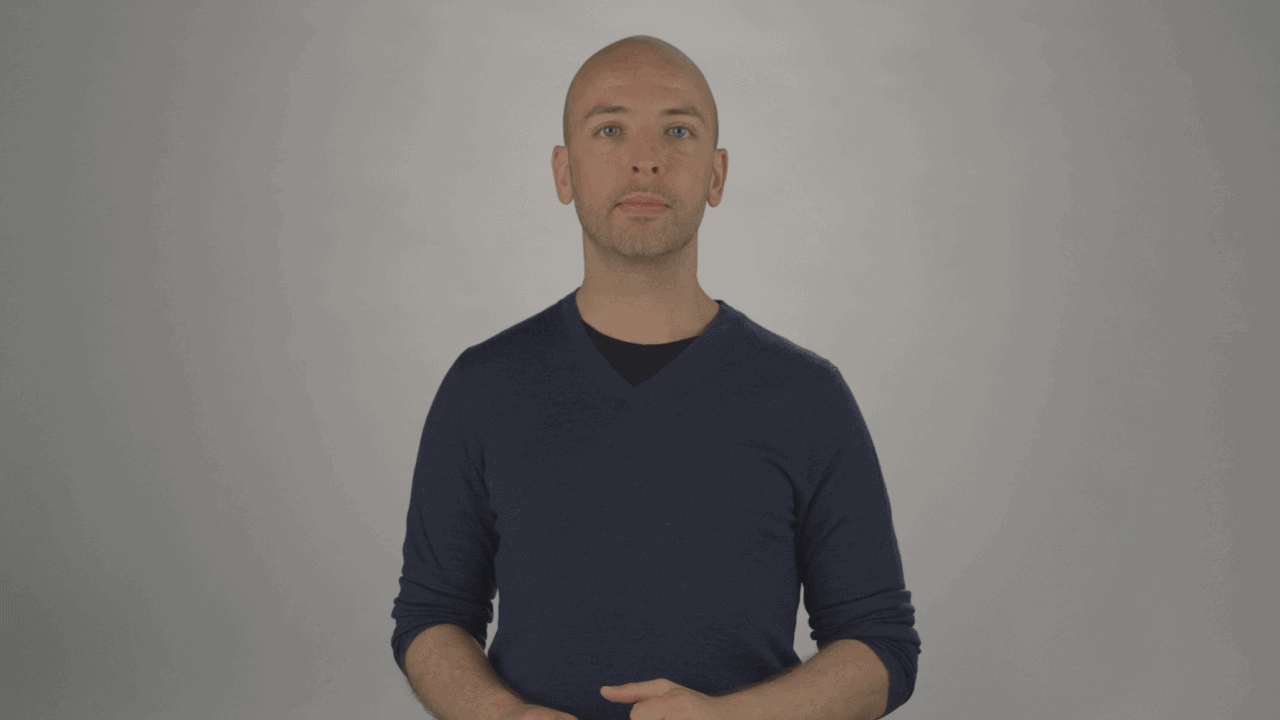
For example, here’s a shot from a video that was filmed in a professional studio with proper lighting:

Looks OK. But it’s flat and dull.
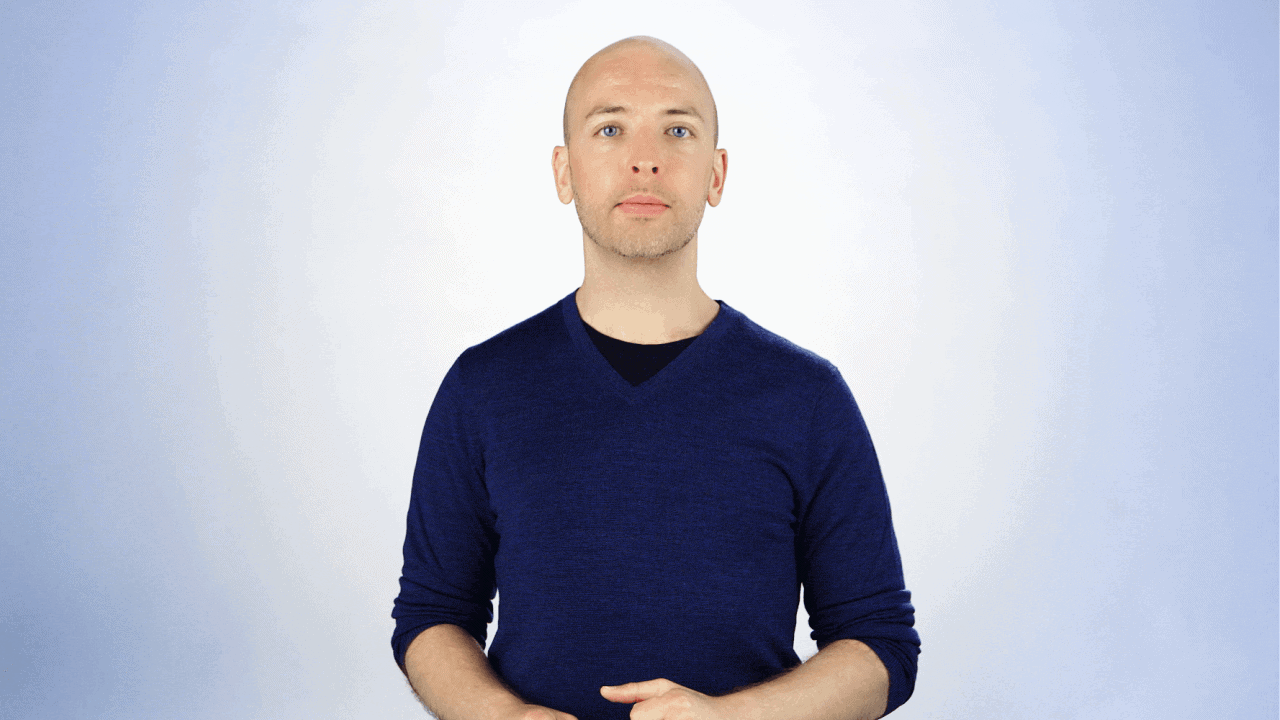
Take a look a the same shot with a bit of color correction:

See the difference?
On-Screen Graphics
You can use graphics in your YouTube videos to help people follow along, to entertain, or to emphasize key points.
In fact, on-screen graphics are a secret weapon that many YouTubers use to keep viewers watching.
For example Ryan Higa uses on-screen graphics to make his video more dynamic and entertaining.
And this cooking video uses on-screen graphics (in the form of text) to help you keep track of each step of the recipe:
B-Rolls
A B-roll is a piece of footage that’s not part of the main video. And it usually appears on-screen as someone talks.
B-Rolls can help make your videos better because:
- They mix things up. Instead of a static shot with a single subject, you can show something completely different in a B-roll shot (which can boost your video’s Audience Retention).
- They help you hide mistakes. If you look weird during a take, but the audio sounds good, you can use a B-roll to hide the mistake.
- They educate. Instead of just explaining something, a B-roll allows you to explain and show at the same time.
For example, this video from BuzzFeed is basically a bunch of guys talking about food. This video could easily be boring, but they masterfully use B-rolls in a way that makes the video super interesting and entertaining:
Angle Changes
Changing your camera angle is a great way to avoid boring, static shots.
Fortunately, you don’t need to change camera angles back and forth during your shoot. With the right footage, you can actually switch between camera angles in post-production. Pretty cool, right?
In fact, if you have a wide enough shot, you can actually zoom in post-production in a way that simulates physically moving towards and away from the subject. Here’s an example:
That said, you don’t necessarily need to change angles that dramatically. Even subtle changes can make your videos more dynamic.
For example, this vlog from Mama Natural uses subtle zooms to avoid using a single, static shot:
Cut Out “Dead Air”
No matter how awesome your video skills are, there’s going to be some dead air in your raw video. “Dead air” is simply sections of your video where there’s nothing going on.
YouTube viewers are impatient. So if your video has lots of dead air, they’re going to watch something else.
For example, this old video from the Backlinko YouTube channel has quite a bit of dead air:
Note the half second of dead air after each sentence. This hurts the flow of the video.
Contrast that with a more recent video from the same channel:
This video was edited to ruthlessly cut out dead air. And that’s one of the reasons that it flows much more quickly than the older video.
Add Life To Your Videos With Music
You may have noticed that lots of YouTube videos use music. That’s because music is an easy way to add energy and life to video footage.
For example, Jeremy Ethier uses music to add a bit of umph to this video about a somewhat dry topic (improving your posture):
And here are some tips for adding music to your videos during the editing process:
- Make it Quiet: Make sure your music doesn’t overpower your voice. Ideally, your viewer should barely even notice your music. You can easily adjust the music track in most editing software tools.
- Use Loops: You don’t want to use an actual song in your video (with a beginning, chorus, hook etc.). Instead, loop a 30-60 second track throughout your video.
- Choose a Mood: For most YouTube videos, you want to use upbeat music. However, there are times where a sappy song or even heavy metal track does the trick. Try watching the same clip with different songs. That way, you can see how each song impacts your emotions.
That said, you don’t necessarily need to use music in your video. Many super popular YouTube channels, like Crazy Russian Hacker (10 million subs), rarely use music.
Collaborating and Getting Feedback
If you work with a team, or just want to get feedback on a video draft, you’ll quickly find that sending Dropbox links back and forth is a giant pain.
Instead, you may want to try using collaboration software like Wipster or Frame.io.

These tools allow multiple people to easily view your drafts, leave comments and more.

Export Settings for YouTube
YouTube has a litany of recommended settings for videos uploaded to the platform.
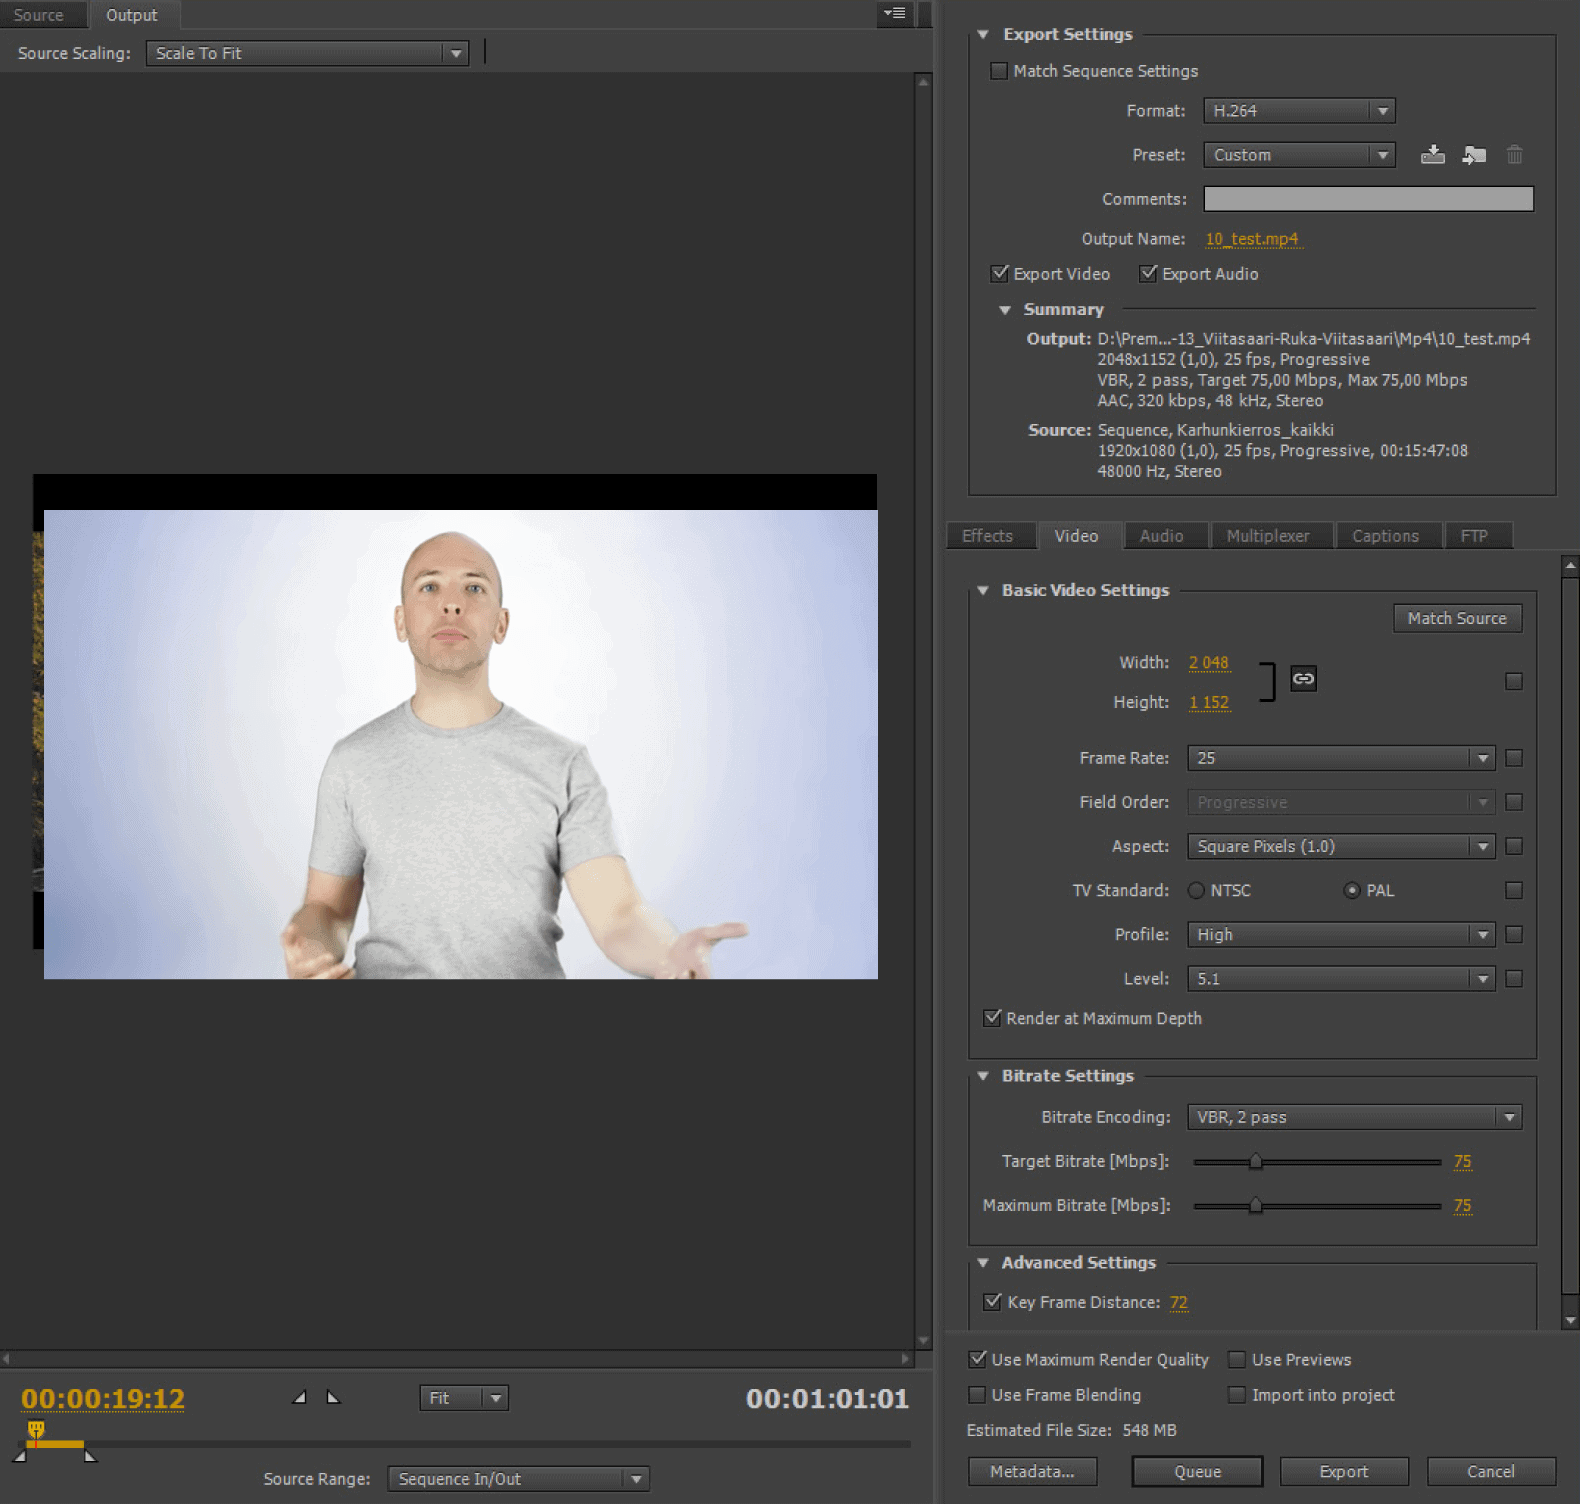
Fortunately, you don’t need to memorize anything as most editing programs have a built-in YouTube export setting:

That said, before you upload, double check that your video is HD (720p or 1080p) with a 16:9 aspect ratio. As long as you have those two things in place, your videos should look great on YouTube.
Learn More
How to Edit Video for Beginners: A Step by Step Guide: Solid overview of the basics of video editing.
Wistia’s Music Collection: Free downloadable music designed specifically for video.
World’s Most Advanced Video Editing Tutorial: 4 hours of in-depth video editing training with lots of real-life examples.